Learning how to brew craft beer at home for beginners is a lot easier than it looks — and a lot more satisfying than almost any hobby you can start for under $200. There are now an estimated 1.2 million homebrewing households in the United States, and the tools, ingredients, and community knowledge available to first-time home brewing enthusiasts have never been better.
When I brewed my first batch, I was shocked by how approachable the whole process was. You don’t need a garage full of gear or a chemistry degree. You need a few good pieces of brewing equipment, quality beer ingredients, and a serious respect for sanitation. That’s really it.
This guide walks you through everything — gear, ingredients, a full step by step guide to homebrewing your first batch, beginner tips, and the legal basics. One thing to know upfront: this article covers extract brewing for 5-gallon batches. All-grain brewing and lager fermentation are great next steps, but they’re covered separately.
How long does it take to brew beer at home? Here’s your full timeline: Brew Day (3–5 hrs) → Primary Fermentation (1–2 weeks) → Bottling Day (2–3 hrs) → Bottle Conditioning (2–4 weeks) = 5–7 weeks total from your first boil to your first sip.
How much does it cost to start homebrewing? Your first batch will run $100–$250 for equipment and ingredients combined. After that, you’re looking at $35–$70 per 5-gallon batch in ingredients alone — about $0.75–$1.50 per bottle, compared to $1.75–$3.00+ for craft six-packs at the store.
What is the easiest beer to brew at home? For batch one, stick with an American Pale Ale, a Blonde Ale, or an American Wheat Beer. All three ferment quickly, come in great homebrew kit options, and are forgiving of minor beginner slip-ups.
- Best Homebrewing Equipment for Beginners
- What Ingredients Do You Need to Brew Beer at Home?
- Step-by-Step Guide to Homebrewing Your First Batch
- Beginner Homebrewing Tips and Tricks: Mistakes to Avoid and Habits That Stick
- Craft Beer Homebrewing Laws in the United States
- Where to Buy Homebrewing Supplies in the Midwest
- Start Home Brewing Your First Batch This Weekend
Best Homebrewing Equipment for Beginners

Every experienced brewer will tell you the same thing: good beer comes from cleanliness, sanitation, and temperature control — not expensive gear. A $150 setup managed with care will beat a $500 setup every time if the cheaper one is better sanitized.
Here’s what you actually need to get started.
Brew Day Brewing Equipment: Kettle, Burner, and Grain Bag
- 8-gallon stainless steel kettle — gives you room to prevent boil-overs on full-volume boils
- Propane burner for full-volume boils; a standard stovetop handles 3-gallon partial boils just fine
- 24-inch stainless steel paddle — avoid wood, which traps bacteria even after cleaning
- Muslin grain bag for steeping specialty grains
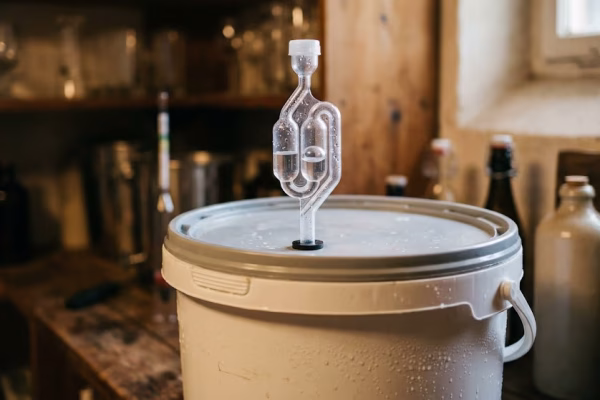
Fermentation Equipment: Fermenter, Airlock, and Auto-Siphon
- 6–7 gallon food-grade fermenter bucket with at least 1 gallon of headspace above the wort
- S-type or 3-piece airlock with a drilled silicone stopper
- Auto-siphon with 5 feet of food-grade vinyl tubing — keeps oxygen out during transfers
- 25-foot immersion wort chiller (copper or stainless), or an ice bath if you’re on a budget
Homebrewing Measurement Tools: Thermometer and Hydrometer
- Digital thermometer accurate to ±1°F — you’ll use this constantly
- Hydrometer with a test tube — your single most important tool for confirming fermentation is done
How to Bottle Homebrew Beer at Home: Bottling Equipment
- 6-gallon bottling bucket with a spigot
- Spring-tip bottle filler wand — prevents overflow and air exposure
- Bench capper — more consistent than wing cappers and worth the extra $15
- 48 amber 12 oz pry-off bottles — never twist-offs, which won’t seal properly with a standard capper
How to Sanitize Homebrewing Equipment Properly
Most failed batches — the off-flavors, the sour notes, the infections — come from poor sanitation. Knowing how to sanitize homebrewing equipment properly starts with understanding that cleaning and sanitizing are not the same step. You have to do both.
- Clean first: Use PBW or OxiClean Free to scrub away any organic residue. Soak for 15–30 minutes, then rinse well with hot water.
- Sanitize second: Mix Star San at 1 oz per 5 gallons of water and coat every surface that will touch your beer after the boil. Don’t rinse it off — the foam is harmless. “Don’t fear the foam” is a classic homebrewing saying for good reason. It breaks down completely and won’t affect your beer’s flavor or head retention.
Keep a spray bottle of Star San on the counter while you brew. If you’re ever unsure whether something is clean enough, spray it again. There’s no such thing as over-sanitizing in beer brewing.
📋 Download the free Beginner Equipment Checklist — full gear list with cost estimates, Midwest shop links, and a brew-day checklist.
What Ingredients Do You Need to Brew Beer at Home?
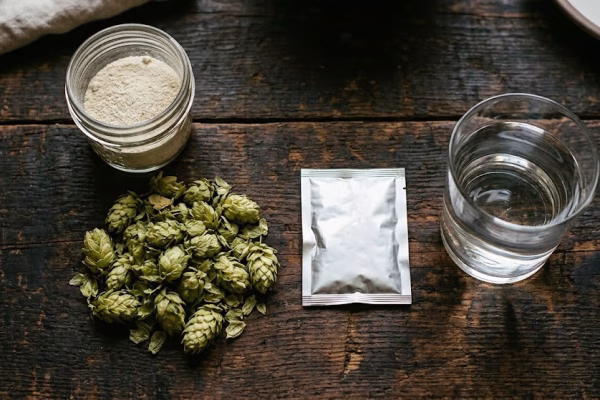
Beer only needs four things: malt, hops, yeast, and water. That’s it. This combination is so fundamental that Germany codified it into law back in 1516 with the Reinheitsgebot. Understanding what each of these beer ingredients does is the real foundation of home brewing.
Best Grains for Homebrewing Craft Beer
In extract brewing, your malt comes pre-processed in one of two forms. Liquid Malt Extract (LME) is a thick syrup, and Dry Malt Extract (DME) is a powder. Go with DME for your first batch — it has a longer shelf life, it’s easier to measure, and it won’t scorch on the bottom of your kettle as easily.
You’ll also steep specialty grains to layer in color and flavor. These go straight into hot water like a tea bag — no complicated mashing required. Here are the best grains for homebrewing craft beer by style:
- American Pale Ale: 2-Row Pale DME + Crystal 40L
- Amber Ale: Pale DME + Crystal 60L + Caramunich
- Wheat Beer: Wheat LME blend (60% wheat, 40% barley)
- Stout: Dark LME + Roasted Barley + Chocolate Malt
Ask your homebrew shop to crush the specialty grains at purchase — most will do it for free.
How to Choose Hops for Homebrewing
Figuring out how to choose hops for homebrewing is simpler once you understand that timing is everything. Hops go into the boil at three different points, and each addition does something different:
- Bittering hops at 60 min: Magnum or Columbus work great here — high alpha acids, clean bitterness, very cost-effective
- Flavor hops at 15 min: Cascade or Centennial — bright citrus and pine character
- Aroma hops at flameout (0 min): Same varieties work well, added at the very end to lock in those delicate aromatic oils
If you’re not sure where to start with hops, just grab Cascade. It’s the most recognizable hop in American craft beer and defines the classic Pale Ale flavor that most beginners already love.
Best Yeast Strains for Beginner Homebrewers
Out of all your beer ingredients, yeast will have the biggest impact on how your finished beer tastes. The best yeast strains for beginner homebrewers aren’t a long list — the community has a clear favorite: Safale US-05 by Fermentis. It’s a clean, neutral dry ale yeast that ferments at 59–75°F, lets your malt and hops shine through, and handles beginner-level temperature swings without complaining. No refrigeration needed, no yeast starter required, and it’s available at almost every homebrew shop in the country.
Differences Between Ale and Lager Homebrewing
The differences between ale and lager homebrewing come down to one thing: temperature. Ales use a yeast called Saccharomyces cerevisiae, which is happy at normal room temperatures (60–75°F) and wraps up primary fermentation in about 7–14 days. Lagers use Saccharomyces pastorianus, which needs cold fermentation (35–55°F) and then weeks of cold conditioning after that. Lagers are also less forgiving — there’s no big malt or hop character to hide any flaws. Save lagers for batch 4 or 5, once you’ve got your process locked in.
Water Treatment Tips for Better Home Brewing
If your tap water tastes good straight from the glass, just brew with it. If your water is heavily chlorinated, crush one-quarter of a Campden tablet (potassium metabisulfite) into your cold brew water before you start. Chlorine reacts with compounds from your grain during the boil and creates a Band-Aid off-flavor that’s one of the most common — and easily fixed — beginner problems.
Step-by-Step Guide to Homebrewing Your First Batch
Here’s exactly how to ferment beer at home from start to sealed bottle, covering a full 5-gallon extract batch. Follow each step in order and you’ll be in great shape.
- Sanitize Everything (30 min before brewing): Mix Star San at 1 oz per 5 gallons and coat every surface that will touch your beer after the boil — fermenter, airlock, stopper, siphon, tubing, hydrometer, and funnel. Let it air-dry. Do not rinse.
- Heat Your Strike Water: For a partial-volume boil (3 gallons), heat your treated water to 155–160°F on the stovetop. For a full-volume boil (6.5+ gallons), fire up your propane burner.
- Steep Specialty Grains (20–30 min): Lower your grain bag into the kettle and hold the temperature at 150–160°F. Pull the bag out before you hit 170°F — going higher causes harsh tannins to leach into your wort. Let the bag drain on its own; don’t squeeze it.
- Add Your Malt Extract and Bring to a Boil: Take the kettle off the heat before you stir in your LME or DME, or it’ll scorch on the bottom. Stir until it’s fully dissolved, then return to heat and bring everything to a vigorous rolling boil. Keep an eye on the first five minutes — there’s a foam surge called the “hot break” that can boil over fast.
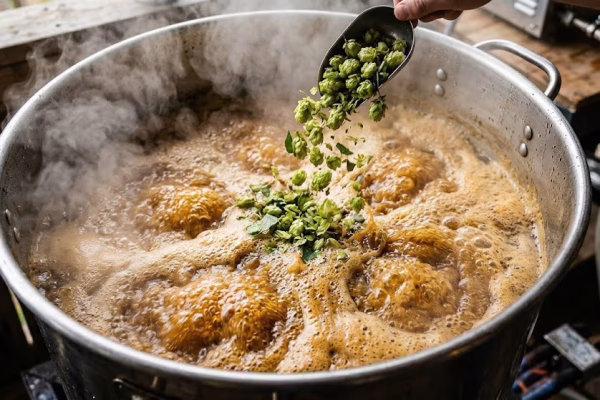
- Hop Additions Through the 60-Minute Boil: Start your timer when the boil begins. Bittering hops go in at 60 minutes, flavor hops at 15 minutes, and aroma hops at flameout right when you cut the heat. Add Irish Moss at 15 minutes if you want a clearer finished beer.
- Chill the Wort to Pitching Temperature: This step is more important than most beginners realize. Get your wort down to 65–70°F using your immersion chiller or an ice bath before you do anything else. Slow chilling leads to dimethyl sulfide (DMS) off-flavors and opens a window for contamination.
- Take Your Original Gravity (OG) Reading: Pull a sample into your hydrometer tube and record the OG. Compare it to your recipe’s target — with extract brewing, you should land within about 5 gravity points.
- Transfer to the Fermenter and Top Off: Move your cooled wort into your sanitized fermenter using your auto-siphon or a sanitized funnel. If you did a partial boil, top off with pre-boiled cold water until you hit 5 gallons.
- Pitch Your Yeast: Sprinkle your dry US-05 right onto the surface of the wort. Seal the fermenter with your sanitized stopper and airlock, and fill the airlock with Star San solution or vodka.
- Ferment at the Right Temperature: Find a dark, stable spot for your fermenter. You’re targeting 65–70°F for most ales. Swings of more than 5°F will stress your yeast and push harsh flavors into your beer.
- Wait It Out (7–14 Days): Don’t open the fermenter. After 7–10 days, take a gravity reading. When you get two identical readings 48 hours apart, fermentation is done. The airlock might stop bubbling before then — don’t go by that alone.
- Bottle with Priming Sugar — How to Bottle Homebrew Beer at Home: Dissolve ¾ cup (4–5 oz) of corn sugar (dextrose) in 1 cup of boiling water. Let it cool, pour it into your sanitized bottling bucket, then siphon your beer in on top of it. Fill each bottle to about an inch from the top and cap immediately. Use the Brewer’s Friend priming calculator to dial in the exact amount for your batch size and target carbonation level. Always use amber pry-off bottles — twist-offs won’t seal, and clear or green glass lets light skunk your beer.
- Condition for 2–4 Weeks: Stand the capped bottles upright at 65–72°F and leave them alone for at least two weeks. The yeast will consume the priming sugar and carbonate your beer naturally. After two weeks, pull one bottle and chill it overnight. If the carbonation feels right, refrigerate the rest.
How to Control Fermentation Temperature at Home
Learning how to control fermentation temperature at home is the single biggest leap you can make as a homebrewer, and you don’t need to spend a lot to do it. During the first 48–72 hours of fermentation, your wort can climb 3–8°F above room temperature on its own. If it gets too warm, you’ll get hot, harsh fusel alcohols in your finished beer.
Here are three options, from free to affordable:
- Swamp cooler (free): Set your fermenter in a large tub of water, drape a wet towel over it, and point a fan at it. Evaporative cooling drops the temperature 5–10°F. Swap in frozen water bottles twice a day to keep it in range.
- Basement or crawlspace: If you’ve got one, use it. Midwest basements hold a naturally stable temperature year-round and are the best free option most brewers have.
- Mini-fridge with a temperature controller: An Inkbird ITC-308 paired with a spare mini-fridge runs $80–$150 total and gives you precision control — including the cold temperatures you’ll need when you’re ready to try a lager.
Beginner Homebrewing Tips and Tricks: Mistakes to Avoid and Habits That Stick

Top 5 Beginner Homebrewing Tips and Tricks
- Make sanitation your religion — Star San is cheap, effective, and the single most important product in your toolkit
- Write everything down on brew day: your OG, FG, temperatures, yeast strain, and tasting notes for every batch
- Don’t rush fermentation — giving your beer an extra week costs nothing but patience, and the result is almost always worth it
- Trust your hydrometer, not your airlock — bubbling tells you something is happening, but only a stable gravity reading tells you fermentation is truly done
- Use a homebrew kit for batch one — pre-measured ingredients eliminate sourcing variables so you can focus on process
Top 5 Homebrewing Mistakes to Avoid for Beginners
These homebrewing mistakes to avoid for beginners show up again and again in community surveys — and almost all of them are easy to prevent:
- Skipping or rushing sanitation — this is the number one reason first batches go wrong
- Fermenting too warm — heat makes yeast produce harsh, alcohol-forward fusel compounds
- Bottling too early — residual sugars cause flat beer at best, and exploding bottles at worst
- Not checking gravity — guessing at fermentation completion instead of measuring it is a gamble you’ll often lose
- Underpitching yeast — one old or undersized yeast packet leads to a slow, stressed fermentation and off-flavors
How to Read a Homebrew Recipe for Beginners
Once you know how to read a homebrew recipe for beginners, the whole world of DIY beer beyond kit brewing opens up. A recipe lists everything in this order: Style → Batch Size → OG/FG targets → ABV% → IBU (bitterness) → SRM (color) → Grain Bill → Hop Schedule → Yeast Strain → Fermentation Temp. It sounds like a lot, but free tools like Brewer’s Friend calculate all of it automatically as you add ingredients, and the community recipe library gives you thousands of tested starting points.
Craft Beer Homebrewing Laws in the United States
Before you brew your first batch, it’s worth spending five minutes understanding craft beer homebrewing laws in the United States. The legal landscape has shifted a lot since the 1970s, but it still varies meaningfully by state.
On October 14, 1978, President Jimmy Carter signed H.R. 1337, creating a federal tax exemption for home-produced beer. Starting February 1, 1979, federal law (27 C.F.R. §§25.205–25.206) has allowed any adult to brew beer at home without paying federal excise tax, as long as you stay within these limits:
- 100 gallons per adult per year (that’s roughly 800 pints — about 1.5 batches per month)
- 200 gallons per household if there are two or more adults of legal drinking age
- For personal use only — selling your homebrew without a TTB Brewer’s Notice is a federal violation
Homebrewing became fully legal in all 50 states in 2013, when Mississippi and Alabama finally passed their own permitting laws. All six core Midwest states (IL, WI, IN, MI, MN, OH) fall in line with the standard federal limits of 100–200 gallons per household. For the latest state-specific rules, the AHA homebrewing rights database is your most reliable source.
Legal Disclaimer: Always verify current homebrewing laws in your state. Never sell homebrew without appropriate TTB and state licensing.
Homebrewing Laws FAQ: Selling, Limits, and How Long It Takes
Q: Can I sell my homebrew? No — not without proper licensing. Federal law prohibits selling homebrew without a Brewer’s Notice and the relevant state licenses. Even taking donations instead of payment is legally off-limits.
Q: How long does it take to brew beer at home? From brew day to your first sip, most beginner ale styles take 5–7 weeks total. That breaks down to 1–2 weeks of primary fermentation and 2–4 weeks of bottle conditioning.
Q: How do I make craft beer at home without a kit? Building a recipe from scratch means choosing a target style, looking up the BJCP parameters for it (OG, FG, IBU, SRM), and using free software like Brewer’s Friend to design your grain bill and hop schedule. Then you order your ingredients separately from your local homebrew shop or an online retailer and follow the same extract process you see above. That said, for batch one, a kit is strongly worth it — it removes all the sourcing variables and lets you focus on learning the process.
Where to Buy Homebrewing Supplies in the Midwest
Shopping at your Local Homebrew Shop (LHBS) gets you something online retailers can’t offer: fresh liquid yeast kept properly refrigerated, real advice from people who brew, and access to classes and local clubs. Here are the best homebrew kit and ingredient sources across the region:
| Shop | State | Website |
|---|---|---|
| Northern Brewer | MN | northernbrewer.com |
| Midwest Supplies | MN | midwestsupplies.com |
| HomeBrewIt.com | IN | homebrewit.com |
| Hop Craft Supply | MI | hopcraftsupply.com |
| Farmhouse Brewing Supply | WI | farmhousebrewingsupply.com |
| Bev Art | IL | bev-art.com |
| Point Brew Supply | WI | pointbrewsupply.com |
| MoreBeer! | National | morebeer.com |
Don’t see a shop near you? Beer Maverick has a full LHBS directory at beermaverick.com/lhbs that’s searchable by state.
Ready to pull the trigger? Download the free equipment checklist with Midwest shop links and order your first homebrew kit today.
Start Home Brewing Your First Batch This Weekend
Every great batch comes back to the same three things: sanitation, steady fermentation temperatures, and the patience to let conditioning do its job. Get those right and the rest of home brewing largely takes care of itself.
Start with a Pale Ale or Wheat Beer, grab a bottle of Star San and a good hydrometer, and write down everything on brew day. Almost every beginner flaw — a slight off-flavor, a little haze, uneven carbonation — fades with conditioning time and gets better with every batch you brew. Your second batch will be noticeably better than your first, and your fifth will surprise you.
Charlie Papazian said it best in The Complete Joy of Homebrewing, in what is still the most famous phrase in the craft beer homebrewing world: “Relax. Don’t worry. Have a homebrew.”
Browse the Midwest shop links above, download the free equipment checklist, and go brew your first batch this weekend.
Always verify current homebrewing laws in your state. Never sell homebrew without appropriate TTB and state licensing.